Wednesday, 30 November 2011

Second Part of the coursework Digipak

On Monday we have started a second part of the practical side of the course. We have to design a CD cover and advertisement poster for our artist. First part of this project - planning will be done in the group. The rest of the actual CD cover will be done individual however we have to stick with the primary ideas that we have discuss early. 
CD covert is very important becuase it help to promote the artist. Moreover the audience know much more better about the artist, becuase they can see what kind of person they are through the CD cover.
 However nowadays, people don't spend their money on the hard copy of the CD cover. They either download from the internet through iTunes or illegal like youtube or piratebay.
That is why it is so important to make very nice and effectiv CD cover to actually draw the audience attention and to make them buy it and to put more money to the music industry.

resize image

Tuesday, 29 November 2011

CD Covers

At today's lesson I discovered that artist usually have a picture of themselves on their first album. I think it's good for many reasons: it shows the audience who the artist/band is and creates the image for them. Few years back, when people were buying CD's and didn't use internet it was good to know who we're actually listening to, I guess that carried on and until now artists usually have them on the front cover. 


Sunday, 27 November 2011

Finished! =(

Well... It is time to finish up our blogs about music video. That's really sad, because suprisingly I had amazing time with girls! OF course, it was stressful, we complained, shouted and disagreed. But we always respected each other and were open minded. There were so many funny moment I couldn't really count! Working with girls on music video was a pleasure! I'm really happy that our combined skills and abilites created something we are proud of!


Even through this time is now finished, I am looking forward to have same fun with creating digipack!


Saturday, 26 November 2011

Tips for future A2 students.

You already have an experience in almost every skills needed to create music video. Believe me, even if you are poor in planning or editing, you will feel much more confident comparing to last year. Some stuff just need to happen. Have faith in yourself!


First very important tip is to FIGHT FOR YOUR GROUP YOU WANT! If you know some people and  you cooperate with them well, do everything to be with them, as it could be a pass to high grade. Don't be afraid to talk to your teacher. They will listen to you if you'll convince them that you are right!


Tip no.2 - choose a song that you like. Choose a song for which you have a plan for already in your head. Share them with your partners. They might re-create them and improve. DO NOT STICK TO ONE PLAN. Be creative. Listen to people and their ideas. Make them better!


Music video can be extremely fantastic experience, doesn't have to be boring. Just make sure you have fun! The results can imrpove if you have funny environment in your group.


In my group, I was the only one who doesn't listen to any electro/techno/dubstep music. As my teammates were, I agreed to make them choose the song. They have a whole lot more ideas than I did, however I was trying to keep  them real and improve. It was fun, girls did a good job, and even through I was awful in initial planning, I did my job to imrpove ideas and not make them "over the moon".


When it comes to editing, spend all your free time you have. It will pay off! You can create something with nothing if you are good in editing. Believe me. Me and girls were "shuffeling" all the time between lessons and breaks to media room and try to add some effects or replace clip with another one. 


The most important work - SAVE YOUR WORK ALL THE TIME AND CREATE BACK UP ON YOUR MEMORY STICKS!!! Learn on our mistakes, for god's sake! Pressing CMD + S take one second, and could save you hours of work!

GIFS showing our reactions

Me, hearing that our artist will be male

Waking up at 7AM for wednesday media session...

Mary, seeing someone eating in media room

Me, eating chips in media room when Mery isn't looking 
Ada's reaction to glitter effect
(OMG GUYS THIS IS AMAZING!!!11!)

Inside Ada's head for most of the time while editing

Our reaction when we realised that music is out of sinc
with movie after days of working

Me, waking up on deadline day to finish
up editing

Me, hearing teachers saying that it's difficult to record
dancers but noone bothered to tell us before

Me, hearing "Feel so close" on Tesco's.

Ada and Evie taking pictures on Mac's.

Me, looking for teachers to give our movie
a feedback

Klaudia's reaction to Me forgetting memory cards for recording

Klaudia disagreeing with Dan about "projector screening"

Evie's reaction when Johnny agreed to skate for us

Me, seeing Final Cut Pro opened on my laptop

Us, hearing good feedback from teachers

Me, seeing me dancing on cinema screening.

Us, leaving college after being finished!

Skills dev. - Editing

Over the time we were making our video, I have learned some useful skills in editing. Here are just some of them...


Colour filters - We were able to change the colours and help the nature look even more outstanding. It is very useful feature, because you can "manipulate" audience's feelings.
Slow motion/fast speed - You can see those effect almost in every film and music video. By slowing down your clip, you can make your scene more dramatic, romantic or create suspence. However, speeding up your clip will make your scene more fast, increace pace and effectivity.

Fade in/out - You can change the way scene ends, and not only see black endings. Very important if you want your project to look profesional.


Cross dissolve - Effect which is also a transition, but you can see two scenes overlapping on each other. In effect, audience can see two scenes at once. Can be very effective if good scenes are used.

 Jump cut - Used almost all the time. It's besically cutting the scenes and "shuffle" them around on timeline. Your movie can be much more effective than comparing to one scene.


Base track editing - This is especially good technique when it comes editing music video. You just need to make sure that music is in sinc with video, then just mark the beat and cut. COuld it be any easier?=)


Match cut - This is useful for the dancing scene and skating. You just cut the scene, and then you try to cut the same scene from different angle/shot type at the same time and let it continue. Effective esspecially on scene with higher pace and tempo.


Reverse effect - We used this effect quite a few times (piano, glitter, dancing). By choosing a right clip, and applying reverse with good speed motion you can make it much more effective and interesting to watch.

Brightness and Contrast - Important thing is your scene is eather too bright or too dark.

Skills development - Editing skills

During the editing process of our music video, I have learnt a range of editing skills and techniques...

Base Track editing - This is different to linear editing as multiple base track recordings are made, which means that the other shots are cut and edited based on those recordings. It is important that these base tracks are synced to the music so that the lip sync also matches.

Colour filters - This effect means that the colours of the shots can be changed. There are different filters, including effects. By changing the colour it represents the intentional atmosphere and what the viewer is meant to see/feel.

Brightness and Contrast - Makes all the difference to the shots! If a shot is too dark, you can play with brightness and contrast so that it becomes brighter with the colour still obtained. This relates to the piano shots, as they were shot indoors and needed a spotlight, but still needed some improvement.

Fade in/out - Creates a transition for one shot to lead to another, which prevents the viewer from seeing just the boring flash of black. It makes it more interesting for them to view and overall makes the video flow better.

Cross disolve - Another effect which creates a transition, only this time both shots one after the other is seen at the same time for a moment, so it is a teaser for the viewer to work out what the next shot is.

Slow motion/fast speed - Slow motion makes the shot more dramatic, it reflects the mood of the song at that moment. For instance the glitter scene, it grabs the attention of the viewer, and forces them to focus on the glitter which is creating a splash effect. In contrast to this, you can speed up some shots, such as the Eleni mirror scene, which helps to edit to the beat, so that the movement of her doing the hand stand and her coming out of it is sped up, to keep the pace. (CMD J)

Reverse effect - This can be seen in one of the piano shots (Running fingers along the piano) and the dancing shots (bottom half shuffle). The outcome of this is so that it is intriguing for the viewers to see movement backwards. (CMD J)

Jump cut - Cuts that skip movements to get a shuffle effect, this works nicely, especially for the music video as you can edit them to the beat. (E.g Steph painting with other shots seen inbetween)

Toggle clip overlay - To make the shots overlap each other, I would use this to toggle with the transparency, so one shot can be seen while another is also playing. (Glitter scene)

Match cut - This is useful for the dancing scene, when the girls are doing cartwheels. It shows the different angles that the dance was shot and overall emphasises the movement.

Skills development

I approached planning my A2 work differently to my AS work. The first thing you do when planning a Thriller opening is to research other examples so that you could think of a plot. However with a music video, there are many genres and there is an endless opportunity to link music with anything and create a video rather than sticking to one genre with Thriller. The music video promotes the certain genre it is, and most importantly the artist who wants to bring out their personality and who they are as a musician. The opening focuses on representing the theme of dark, mysterious nature. This can relate to the genres of music video as depending on the song, the music video will translate the theme through mise en scene and editing. For example a pop song will be upbeat and happy, and a slower song will be more emotional and calm.

In terms of shot planning, it was easier to plan shots for the thriller opening, as what is in the shot is important as it is supposed to tell a story. With a music video, initial ideas are made, and there is a big responsibility for the artist to lip sync correctly and if they have choreography to get it right. Editing a music video is harder, as I found the thriller had shots that had to be in a certain place at a certain time. The music video shots are continuous and repetitive, so it can flow throughout the whole of the video.

The main aspect of planning was the music, everything revolves around the music for the music video. It was important to play the music while filming, so that there is a greater chance of things syncing to the beat. For the AS work, the music was thought of and made by us after filming.

Editing - Uploading to Blogger

After I filmed the feedback videos on my iPhone, I had trouble uploading all of them onto Blogger when I got home. This was because the file was too big. (It was very long, Micky's video was around 17 minutes before I cut it!)

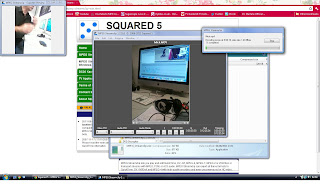
This was the first step I took, which was trimming the videos on Real Player trimmer...


I even tried converting it to different formats but I still could not upload it!
I decided to search for online editing software. I found a site called 'Creaza', I made an account and edited the video and it uploaded through the HTML code! However when I posted the blog and checked, every time it had a pop up saying loading... which to me was not acceptable. Also when I decided to edit Mary's video, the whole software language turned to Norwegian, which means that I couldn't understand how to work it any more, and Google failed to translate it to English for me!

It was really easy to use, it was similar to Final Cut Pro, and here you can add text.

I then found this software called 'Video Pad Editor Professional' for windows, which was so much better!
I could add subtitles with ease and there were many transitions and effects I could use. I could also edit the audio if I needed to.
I was able to save the movie as an mp4, and made sure it was the right size. Now all of the videos are on Blogger! :D

Friday, 25 November 2011

FINISHED YO!


On Friday as a day of final deadline we had spent it again on editing. After trillion of hour in the media editing room, we finally finished our wonderful project.
This moment was so special for us so we decided to take video of ticking off 'finished' on the main check list in the media room.


Feedback videos

We asked Micky, Tony, Rebecca and Mary for feedback before we finish...

This was focused on the skateboarding scenes. Micky thought that making them black and white would make them stand out and look different, but Tony argued that the use of colour works with the theme. He also said the video reminds him of exuberant 'euro pop'!!!

We asked Rebecca for her opinion...
We looked at what it would look like in black and white but decided that keeping the original colour would look best.

For another opinion, we asked Mary for overall feedback.
The fact that we didn't have that much time before the deadline loomed on us, but we think we did the best we could, and any things we needed to improve would be an advantage for next time. This included the possibility of improving the framing and camera work in the dancing scene, the lighting and playing in the piano scenes and some of the lip syncing.

This post is called: Group 17 is the best ♥ !

Group 17 would like to thank: 

-our understanding teachers for accepting our idea which they weren't sure about, but trusted us enough to say we can produce it. 

-other media students for giving us helpful feedback. 

-everyone who took part in the filming process, this includes our cast: Stephanie, Eleni and Johnny.

T H A N K   Y O U 


tips for next year's A2 students- producing a music video

So, as a proud A2 student of our baby-music video, I can give some tips for the next year's students. 


You're realize how much your skills have improved; you'll feel much more confident when it comes to editing, handling the camera, planning etc.  I didn't see it at first, last year I was so bad with editing I actually hated it, and this year I realized I can do so much stuff with Final Cut Pro that I was editing and being confident about it. (and surprisingly excited!) 


When planning your video, pick a song that gives you the most ideas. We did that and we came out with a great music video, that gave us so much fun. We brought our personal interests into it. Think of the things you like or have, which you might use.Either if it's an activity, setting or a special prop. And I think our video is a great example of how you can have fun with what you're doing. . We knew that the song will be hard, because it's quite repetitive and many people know it. BUT still, we decided to face the challenge and work on it, because while listening we hand the most ideas. I remember us saying "it'll be hard to move away from the actual video, and everyone know the song. It's a good challenge, but when we but so much work into it, it will pay off' And it did =) ! 


Music video doesn't have to be boring, you get to plan what will be in it, make sure you will have fun! I had so much fun working on planning, filming and then editing!


When picking people in your group, don't pick your people you have nothing in common with. Pick people that share similar interest, listen to the similar music. Because this will allow you to share your ideas which many people accept. I think our group was perfect- we had 3 people with similar ideas and 1 who was keeping it real and was helping us, accepting our ideas, trying to improve them. Sometimes working with people with different interests and style may be interesting, because you get to know a different genre and conventions it had. I know someone who struggled because they didn't like the genre of the music. So, whichever suit you most :) 


Next is filming; don't do stable shots. They're boring! You're producing a music video, which will entertain people, make them excited, sad or whatever. Hold the camera in your hands, walk around with it. Pan, track! You'll see that the movement often fits with the beat, if not you can always slow or speed it up! Try not to shake it too much, but don't worry if it's a little shaky, it looks good sometimes. Let a person with the least shaky hands do it. 


When it comes to editing- spend time on it! seriously, it will pay off. the best videos were edited the longest. In A2 you'll have much more free time between the lessons or days off. Get everyone's timetable and switch, when someone is in lesson other person/people can edit. Then you show what you've done and talk if it's good, you can always change it. That's why it's worth spending time on it.


While editing, take short breaks. Walk out of the room, get a drink, eat a sweat (of course outside the classroom with Macs:D). When sitting in front of the computer for too long I felt like ripping my face off, because I was getting angry more quickly when it didn't work as I wanted it to. 


And whatever you do, whatever you film PLEASE, PLEASE, PLEASE remember about one and the most important thing in this whole process: SAVE YOUR WORK!! It's worth spending 3 secs on pressing CMND+S to save it, rather than spending 1h or so trying to fix everything. (sometimes when you paste, the whole thing moves back and it doesn't fit the song anymore). I made a sign that said "SAVE" and we had it it front of us, and saved literally every 1 minute. But then, if something went wrong we had an updated version. 


You'll find producing music video much more interesting, because it's something you can relate to.Good luck! =] 

Skills development and Tips

During this project I have improved and develop new skills in terms of planing, filming, editing and blogging.

PLANNING

  • simple ideas- simple ideas are the best. If you go into some complicated ideas after a while you can find hard to realise your idea. For AS Thriller as well as for A2 music video, we try to keep with the simplest ideas and I believed it is a good structure which open door for success.
  • location and storyboard are crucial - none of us in the group could draw so we wrote down all the shots or ideas we want to do during filming. 
  • lots of footage. For AS we shoot all thriller opening sequence in about 3 hours, where for A2 we can spend much more time. Our first filning session in the Art room took about 4 hour.
  • spending more time for creating pitch. It is very important to show your ideas and though as clear as you can to your teacher. 
EDITING
  • colour filters - allow you to chnage the colour and can make the nature look much more better. It can emphasise the emphasphere eg. summer through warm, yellowish colour.
  • slow motion/fast speed- those 2 effects are used very common in the movies as well as in the music video. By slowing down we can draw the audience attention into the particular thing, making in much more important. By speeding up we will increase the pace and effectivity.
  • fade in/out - it changes the way scene ends or begin. It is very easy and gives your project very proffesional look.
  • cross dissolve - effects which is also a transition, however you can only see it when two scene are linked toghether , in another words - overlapping on each other. It is very powerful and effective tool.
  • jump cut- basically used nearly all the time. It is when we cut the scene and suffle them around on timeline. Through this create a greater feeling and experience to the audience.
  • base track editing- This is especially good technique when it comes editing music video. You just need to make sure that music is in sinc with video, then just mark the beat and cut. Could it be any easier?
  • Match cut - This is useful for the dancing scene, when the girls are doing cartwheels. It shows the different angles that the dance was shot and overall emphasises the movement.
  •  Reverse effect We used this effect quite a few times (piano, glitter, dancing). By choosing a right clip, and applying reverse with good speed motion you can make it much more effective and interesting to watch.
  • Brightness and Contrast - Important thing is your scene is eather too bright or too dark

Finished ! Sad, sad, sad !

Our music video is finished now. And I feel really sad. We all had very stressful time, but now when after all I feel like something is missing. We had spend lots of time to film and even more for editing. After bad and good moments we create something which differ from the rest of the music videos. We created a colourful and energetic music video with a positive flow.
But we want tp create more and more. That is why I am sad. But hopefully we are going to have to same fun with a digipak.

Pictures

Here are some of the pictures
making an animated gif

Performers

Here are the picture of people who are in the music video


This is Robert- our artist and singer.


This is Steph. She was in the art room painting a nice picture of flowers.
This is Evie. She was playing on the piano in the music video.

 Eleni- one of the dancers
 Klaudia - another dancer
 Ada- another dancer


Johnny - the skater


And this is a collage with picture of how they look in the music video. (all pictures in the same order as those above)

Differences between AS and A2

My planning in A2 was nothing like in AS, when we were doing thriller videos. The first huge difference is that we don't have to stick to one genre, and we have thousands of different songs to choose from. Metal, rock, hip hop, rap, techno, dupstep... Also, music videos are everywhere and you see them almost everyday. You've seen like million different ideas used to create music video. And it was something absolutely amazing, but yet really scary and confusing.

The way you'll make your music video will reflect on the performer. Happy and funny video will reflect very positively on him/her, where sad and dark-ish will make performer look confident. This has to be chosen depending on the genre. Metal, rock and hard "stuff" are probably going to be shown as darkish and powerful, where techno as brighter and happier.

Of course, it was much easier this time to work as a group as all of us have some experience in that. Same thing with planning and editing. All of us done some work in this area. Luckly for our group, we cooperated really well over the time. When someone wasn't quite good in some specific area, the other person who felt more confident always helped.

Creating music video is muuuuch more harder comparing to opening sequences, especially because you have to make it more interesting and fun to watch. There is a huge responsibity on artist, as well as on camera man, as most of our shots cannot be changed or re-recorded. You need to use much more locations, try to make MES as most effective and appropiete for genre as possible. Also, you need to be prepared to change your plans and make an alternative instantly. 

Filming -deleted scene


This is the original music video we were referring to!

painting

I was listening to Pink- Perfect, today and it reminded me of it's video clip because it had a painting scene in it. I wanted to compare it to what we've done, so here goes:

  • from 3:15 the girl is painting, there's a transition used, so we see Pink at the same time, a little to the left bottom corner. I like the way it's made, the two things happen at the same time but still we're able to focus on one thing. I also like to use of colours, strong contrast, almost like te outline is staning out even more.

In our painting scene we have separate shots of painting, but also have it transparant with something else-eg the skateboarder. (obviously we used a different shot than in Pink's video).

  • there's an extreme close up on the character's eyes, which I think shows her focus on the painting. Because we had so many 'characters' in our video, the extreme close up on eyes would be pointless because audience wouldn't know who it is. We've done it on the piano scene insteead, because Evie (the pianist) had glitter make up and her face appreas more often, than the painter's face. on the painting scene we focused more on her actions, rather that her 'personality' emphisided by her looks.

  • at 3:19, there's a side shot, which we also used. I think it's very effective, because the audience can see the full action and the painter aswell.

  • in both, our and Pink's video, there are extreme close ups on the brush and the paint, which brings the attention to the activity.
  • in Pink's video, the action done are dynamic and energetic, and that's what we told our painter to do. As paiting is quite a calm activity, when it's done faster, with more energy it looks like the painter is creating someting great, that they're rushing to get it done, and their mind is set on this one thing.
the main difference is the costume, I like the Pink's version more when it comes to this. The painter is wearing dirty, painted clothes and her hair is uneatly tied back. This adds an atmosphere and we can see that the painted is professional. Our painter was wearing a clean apron, and full make up, looking nice which didn't really look professional. BUT, again we didn't focus our video just on the painter, if we did we would think more about the costume. Still, we used an apron to fit with the scene.

This is the video:

Initial feedback from Rebecca


Rebecca said that our video is very enjoyable to watch especially because of mixture of colours, but she doesn't really understand what's going on in it. She also complained that some of our sip sincing was out of place. We will be working on that! =)

Thanks 'Becca!

Helpful feedback from Micky


Initial feedback from Dan and Eleni


It was quite loud in classroom, so you might not hear everything he said. In short, he was saying that our video is good enough to be our "final edit" and he would be happy to play it on cinema. There was one scene that stroke him and we should get rid of it.

Thursday, 24 November 2011

Projector Filming last session

Regarding to small number of base track, we had to shoot a new one. In the 'last minute', where deadline was nearly there we decide to invent new idea for base track.
While we were filming we though that we had enough base track, however as we progress in the editing, we realised that we need more of solid base track to fill the gaps. Also we had to introduce a new location where Robert could sing, because one was ot enough. The gaps was due to the mistakes in the lyrics or was not enough clear to be put into the video. 
Because we did not have enough time we decided to stay in the college and use one of the room which is adapted to film. 
We wanted to create something colourful and energetic. We decided to use a projector with some pattern/style. 
We decided that Robert is going to stand in front of the projector and we will film it.
 Here are pictures from this session:


This is a video we found on the youtube. We have mutted it, and the played our song choice. We also sang with Robert to make him feel more comforable and confidence. And I think he did really good job.

Editing

We recorded some movies to show you a piece of our final editing. What we did was choosing some final clips and put them to fill blank spaces on our time line. Now we will be adding contrasts to clips which are either too dark or too bright. Lucky enough, we still got one day to polish up stuff =)


Screen recording from Tuesday


This is a screen recording from the Tuesday editing session. We have played around with a colour filters.

Test shot from the projection


Before we started filming Robert, we wanted to test if the projection came out clearly. We also had a bit of fun. We dance along how the patterns move and if it came across well on the camera.
As you can see, we liked as the colour change, which actually has completed our idea of colouful and funny atmosphere. The audience will find this funny, and would want to dance along to it.
Moreover, we potrayed our artist as a young person full of passion and energy.


Rough Cut 2

This is a rough cut from yesterday. We still have lots to do, however we are really happy with the outcome we have so far.

Last wednesday session

Since this was our last lesson in which we are allowed to edit our music video, we needed to hurry up and finish up at least 3/4 of while song. It would be a much of a problem, however we didn't pay much attention to our time line, and when we entended one clip, everything moved up one space. Also, as I said, we didn't pay much attention to the time line and we didn't realise it on time and saved whole project without a possibility to go back.

In result, we've lost about an hour getting stuff sorted out.

Later on, we went to the other room to record me lip syncing in front of projector playing colourful "ELECTRO POP" words. Dan said it wouldn't look good, because of the light covering my face. We still insisted record it and it was probably one of the best choices we did. The result was astonishing!

Now it's only time to paste it into time line and add final effects. =)

Wednesday, 23 November 2011

Visual Effects

I found some interesting movie showing how useless is real world only when you have enough editing skills. You can see that in most movies everything is done digitally, and actors are performing in front of green screen. I'm pretty sure same thing applies to music videos...

Filming - Last Base Track Filming Session

While editing, we saw that we needed more base track shots to fill in gaps and mistakes with the lyrics. So we filmed in one of the media rooms. We wanted to inject more colour into the video, to make it look fun and energetic. We used the projector, in collaboration with the computer to bring up a Youtube video to full screen, and get Robert to stand in front of it, to give a pattern/light affect. At first Klaudia wanted to find some visual effects to show, but we typed in electro pop and found some colourful gifs that change colour. This makes it more interesting and makes the video flow nicely.  

(Pictures are a bit dark - taken on my iPhone)


This is the video we used for the projection. We muted the background music of this, and played 'Feel so close' instead on another tab. At the end of this video, annotations popped up, so we had to get rid of those in another take.